Skip to Content

Blog Archives

Spot Check Inventory: A Guide for E-commerce & FBA Sellers

A customer places an order for your last top seller. The marketplace says you have stock. Your store says you have stock. Your team walks to the bin and finds nothing.

That's the moment most operators realize they don't have an inventory problem. They have a process problem.

In e-commerce, bad counts don't stay contained. They trigger backorders, split shipments, rush receiving, extra support tickets, and awkward conversations with marketplaces and clients. One wrong bin can ripple through picking, replenishment, purchasing, and FBA prep in a single shift. Spot check inventory is how disciplined operators catch those failures early, while the mistake is still small and the fix is still cheap.

Beyond Counting What You Have

At 2:14 p.m., a picker hits a bin for a same-day order and comes up empty. The WMS shows one unit available. The marketplace is still accepting orders. Customer support has no reason to intervene yet. Operations already has a problem.

That situation is why spot checks matter. In a live e-commerce warehouse, inventory accuracy is not just about knowing what is on hand. It is about proving that receiving, putaway, picking, returns, relabeling, and system updates are all working the way they should. A spot check is a control inside the operation, not a bookkeeping exercise after the fact.

Full physical counts still have a place. They help validate inventory at a broader level and support financial controls. But they are slow, disruptive, and too infrequent to catch the day-to-day failures that create oversells, short picks, and bad replenishment decisions. Teams that run high-volume DTC, marketplace, and FBA workflows need faster feedback.

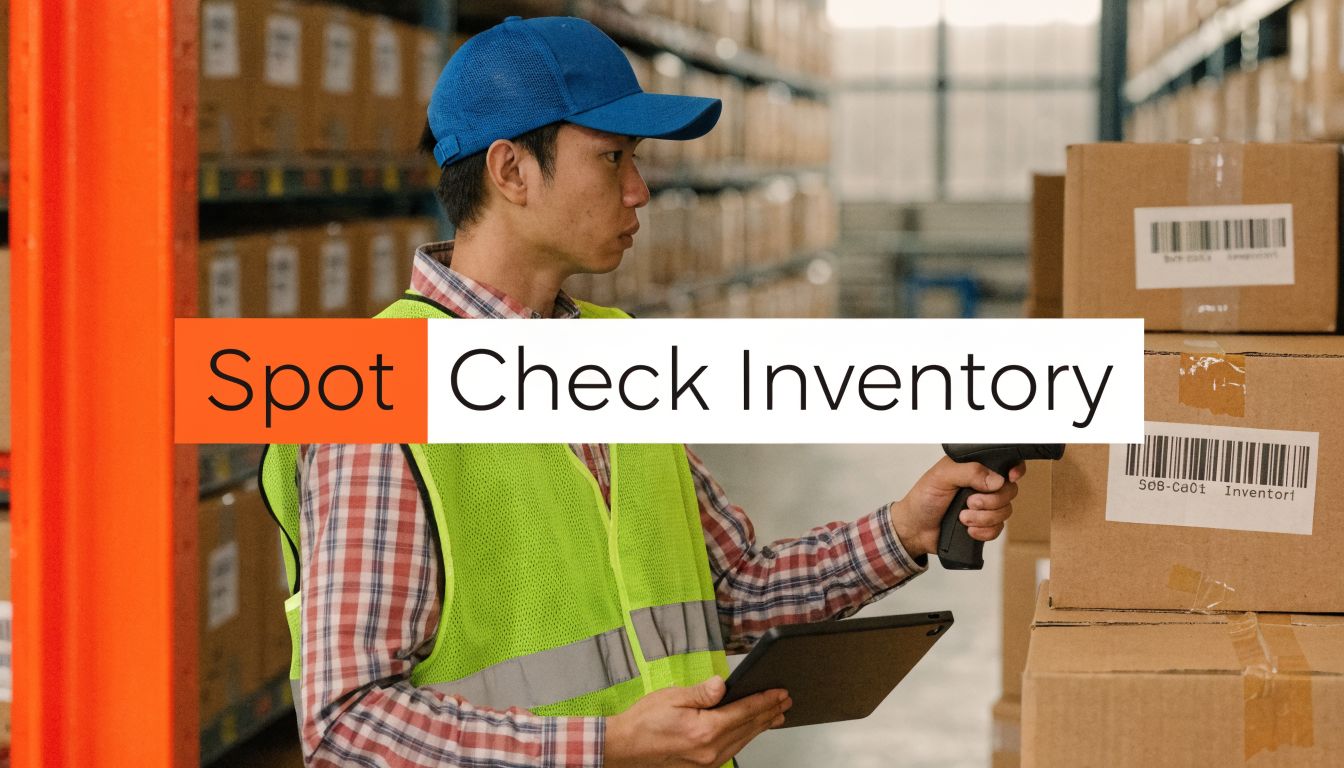
Why operators trust spot checks

A well-run spot check program exposes the failure mode, not just the missing unit.

It usually reveals one of three things:

  • Ghost inventory: The system shows stock that is not physically available.
  • Mislocated inventory: The product is in the building, but not in the assigned bin.
  • Process failure: Receiving was rushed, putaway landed in the wrong location, returns were not reconciled, or damaged units stayed available for sale.

That distinction matters. If a checker finds a discrepancy and the team only adjusts the count, the same error comes back next week. If the checker identifies where the process broke, the warehouse gets better.

This is especially important for brands working across Shopify, Amazon, retail drops, and 3PL replenishment schedules. Inaccurate inventory distorts purchasing, labor planning, and transfer decisions. It also gets in the way of improving Amazon profitability through smart logistics, because margin work falls apart when the stock file cannot be trusted.

What spot checks actually do

Spot checks shorten the gap between error and response.

High-performing warehouses pair spot checks with formal physical inventory counting methods so they can validate broad inventory positions without waiting for a shutdown to catch operational drift. The spot check handles live risk. The formal count confirms larger patterns. Used together, they give operators a practical way to control both daily execution and periodic reconciliation.

That is the shift. Count inventory to prevent fulfillment errors, not just to explain them later.

Designing Your Spot Check Program

A client launches a promotion at 10 a.m. Orders spike by noon. By 2 p.m., support starts asking why a top SKU is oversold even though the WMS showed stock available all morning. That problem usually starts days earlier, with a slotting error, a bad return, or a rushed receiving decision that nobody checked in time.

A person in a green sweater points at a logistics flowchart while analyzing inventory data on tablet.

A useful spot check program is built to catch that drift before it hits order allocation, marketplace availability, or a client replenishment plan. In a 3PL environment, that means the program has to fit live operations, tie back to the WMS, and focus labor where errors create the most downstream cost.

Build your program around risk

Start by ranking inventory by operational exposure, not by how easy it is to count.

Use a practical priority model:

  • High-value or fast-moving SKUs: Count these more often. Errors here distort available-to-sell inventory and create customer-facing failures fast.
  • Problem SKUs: Put repeat offenders on a watch list. That includes items with frequent mis-picks, similar packaging, returns confusion, or recurring damage notes.
  • Compliance-sensitive inventory: Check FBA-prep items, bundled kits, date-sensitive stock, lot-controlled inventory, and anything with labeling requirements more often.
  • Low-touch, stable items: Reduce frequency here unless variance, aging, or order pattern changes justify more attention.

Many teams also assign risk by location, not just by SKU. Returns shelves, repack benches, staging lanes, and overflow storage create more inventory drift than clean pick faces. That is why mature operators pair SKU risk with location-based warehouse cycle count procedures instead of waiting for a monthly review to show the same problem again.

Choose the right check type

One method will not cover the whole building. A good program combines check types based on the failure you are trying to catch.

Check type Best use What it catches Trade-off
ABC style checks High-value and high-velocity SKUs Errors that hit service levels and cash position first Low-volume SKUs can go too long without review
Random checks Shrink, unexplained variance, control testing Unexpected errors and suspicious patterns Hard to scale if random is your only method
Location checks Bins, shelves, returns zones, staging areas Putaway mistakes, mixed inventory, housekeeping drift May miss broader SKU history
Event-driven checks After receiving, relabeling, kitting, or returns New errors before they contaminate inventory records for days Depends on supervisors triggering the task on time

In practice, event-driven checks do a lot of heavy lifting for e-commerce brands. If receiving shorted a carton, a bundle was built with the wrong component, or returns were put back into active stock without inspection, waiting for a general count is too late. The WMS should create a check task as soon as that risk event happens.

Scheduling That Survives Busy Days

Spot checks fail when they depend on spare time.

The schedule has to survive peak pick waves, late inbound trailers, and month-end pressure. In our operations, that means short count windows inside normal labor planning, named owners by zone or shift, and a trigger list that creates immediate checks after receiving exceptions, returns spikes, or relabel work. If nobody owns the count and nobody owns the follow-up, the SOP looks good on paper and dies on the floor.

Set the cadence in the WMS if you can. Recurring tasks, exception flags, and queue-based assignments keep checks visible when supervisors are juggling outbound volume. For 3PLs, this matters even more because one inventory error can affect multiple channels at once, then turn into client credits, expedited transfers, or marketplace penalties.

Spot checks work when they are part of the operating rhythm, with clear ownership and a defined escalation path.

Keep the schedule tight enough to catch drift early, but not so aggressive that the team starts pencil-whipping counts to get through the queue. The right cadence is the one your warehouse can execute accurately every week.

The Spot Check Execution Checklist

Good spot checks are boring in the best way. Same sequence. Same tools. Same documentation. That consistency matters more than speed.

When operators improvise, they skip the details that explain the discrepancy later. The count becomes a loose estimate instead of a controlled check.

What the checker carries

Before walking the floor, the person doing the spot check needs a standard kit:

  • Scanner or mobile device: It must connect to the WMS in real time.
  • Current task list: SKU, location, lot details if relevant, and reason for check.
  • Discrepancy log: Digital if possible. Paper only if the update gets entered immediately.
  • Condition notes workflow: A way to tag damage, packaging defects, relabel needs, or mixed inventory.
  • Basic handling tools: Marker, tote, labels, and any approved hold tags for quarantined product.

A six-step infographic checklist outlining the professional process for performing an inventory spot check procedure.

The floor SOP

Use a fixed sequence every time. This keeps the result defensible and the corrective action clean.

  1. Confirm the exact location first.
    Scan the bin or shelf ID before touching product. If the location is wrong, every count after that is contaminated.

  2. Isolate the inventory.
    Don't count through clutter. If mixed SKUs, repack materials, or return items are crowding the location, separate them visually before tallying.

  3. Count the physical units carefully.
    For each unit, verify you're counting sellable stock, not damaged pieces, test samples, or prep rejects waiting for disposition.

  4. Check product identity and condition.
    Count accuracy means little if the units are mislabeled, bundled incorrectly, or sitting in the wrong packaging configuration.

  5. Compare against the system immediately.
    The WMS is the system of record. Match the physical quantity, SKU, and any location metadata while you're still standing at the bin.

  6. Record variance before leaving the aisle.
    Don't trust memory. Enter the discrepancy, status, and any visible clue to root cause in real time.

What to verify beyond the number

Strong spot checks aren't just a quantity exercise. They're also a quality gate.

Look for:

  • Label integrity: Wrong FNSKU, unreadable barcode, duplicate labels, missing labels.
  • Packaging accuracy: Incorrect bundling, missing inserts, wrong poly bag, damaged carton.
  • Location discipline: Product in overflow with no notation, mixed lots, or loose units in a reserve slot.
  • Sellable status: Damaged units that should be quarantined but are still available to ship.

A location can be numerically correct and still operationally wrong.

The rule most teams break

The correction has to happen at the same speed as the discovery. If the team counts now but updates later, the warehouse runs on old data for the rest of the shift. Pickers keep pulling against bad stock. Replenishment keeps chasing false shortages.

That delay is where avoidable client cost starts.

A disciplined spot check inventory SOP requires immediate action:

  • Simple count mismatch: Adjust according to authorization policy.
  • Condition or compliance issue: Move inventory to hold and document why.
  • Unclear cause: Freeze the location until a lead reviews it.
  • Repeat discrepancy: Escalate to root-cause review instead of treating it like an isolated miss.

The checker's job isn't just to find the error. It's to leave behind a cleaner system than the one they walked into.

From Discrepancy to Root Cause

A count mismatch is only the symptom. The useful question is what operational step created it.

Many businesses lose money by stopping at the adjustment. They correct the quantity, close the task, and move on. Then the same issue reappears in receiving, picking, or prep because no one traced the source.

Start with the moment the inventory diverged

When a spot check finds variance, pause the correction long enough to reconstruct the last known good movement.

Ask in this order:

  • Was the product received correctly? Wrong unit count, wrong SKU, unlabeled overage, or freight damage not recorded.
  • Was putaway clean? Inventory scanned into one location and physically dropped into another.
  • Was picking accurate? Short picks, mis-picks, or substitutions that weren't reversed correctly.
  • Did returns create confusion? Product came back, got restocked informally, or landed in the wrong bin.
  • Was there a prep or compliance failure? Repackaging, relabeling, or bundling changed the sellable state without a clean system update.

That sequence matters because it follows the warehouse flow instead of guessing.

A simple decision path

Use a category code for every discrepancy. Don't leave it as “inventory variance.”

Discrepancy category Typical signal Likely process owner
Receiving error Mismatch appears soon after inbound Receiving team
Putaway error Inventory found nearby or in overflow Putaway team
Picking error Open orders or recent short shipments involved Fulfillment team
Returns error Restocked unit quality or quantity doesn't match Returns team
Prep or compliance error Label, bundle, or packaging issue FBA prep or kitting team
Unexplained loss No clean movement trail Supervisor investigation

Don't ask “Who made the mistake?” first. Ask “Which workflow allowed this mistake to survive?”

That shift keeps the review productive. Operators will hide less and report more when they know the process is under examination, not just the person.

Use the pause-button rule on live work

Most published material on spot checks talks about personal recovery, but the idea of stopping in the moment has a direct warehouse parallel. The source material behind that concept notes that adapting the pause-button discipline to fulfillment checks, such as catching FBA labeling non-compliance before an inbound shipment, can significantly reduce Amazon penalties and improve seller compliance rates in this discussion of Step 10 spot-check thinking.

That's useful on the floor because many warehouse errors happen under speed pressure. A lead notices a prep station relabeling units with the wrong template. A receiving clerk sees cartons with mixed product. A picker spots units staged in the wrong lane. The right move is immediate interruption, not end-of-day review.

Patterns matter more than isolated misses

One discrepancy can be random. Repeated discrepancies in the same flow are not.

Track whether errors cluster around:

  • Specific shifts
  • Specific SKUs
  • Specific clients or prep types
  • Specific warehouse zones
  • Specific handoffs between teams

If the same SKU repeatedly goes missing after relabeling, you don't have a count problem. You have a prep control problem. If damage repeatedly appears after receiving but before putaway, the issue may be handling or staging discipline. Spot check inventory becomes powerful when it tells you where the process bends under pressure.

KPIs for Measuring Spot Check Success

A warehouse can report 99 percent inventory accuracy on paper and still miss the problems that create chargebacks, backorders, and client escalations. I care less about a flattering headline metric and more about whether the team can catch a variance early, assign the right cause, and close it before it spreads into receiving, pick faces, or outbound.

That is the difference between spot checks as a counting exercise and spot checks as an operating control. If your brand works with a 3PL, those KPIs also need to show accountability across company lines. A good scorecard makes it clear whether the issue came from inbound handling, replenishment, prep, picking, or system discipline.

The KPI set that actually helps operations

A useful dashboard answers four operational questions:

  1. How often do checks find a real variance?
  2. Which process is creating the variance?
  3. How long does correction take from discovery to closure?
  4. Are the same errors showing up again?

Keep the scorecard simple enough that a floor lead, ops manager, and client services manager can all read it the same way. If your reporting gets too abstract, no one uses it to make decisions.

KPI Formula Target Example
Inventory record accuracy Accurate checks / total checks High and stable, with exceptions explained Cycle of checks shows only a small number of approved variances
Discrepancy rate by SKU Variances for SKU / total checks for SKU Lower on stable SKUs, watched closely on problem SKUs A prep-heavy SKU keeps appearing in variance logs
Root cause breakdown Count of variances by category Clear categorization with limited use of “other” Receiving errors outnumber picking errors this week
Time to resolution Time from variance logged to corrective closure Short, consistent, and visible A mislabeled inbound unit is corrected before inventory is released
Repeat variance rate Repeated issues on same SKU or location / total variances Trending down The same reserve location keeps producing mismatches
High-impact issue count Number of compliance, damage, or shipment-blocking issues found Low, with immediate escalation An FBA label problem is caught before shipment handoff

What strong performance looks like

Strong spot check performance does not mean the dashboard shows zero discrepancies. In real operations, zero usually means the team is checking too little, checking the wrong places, or logging issues poorly.

What I want to see is early detection, clean coding, fast closure, and fewer repeats over time. Small misses should surface before they become multi-order problems. High-impact failures should trigger action the same shift.

The KPI dashboard should prove that the operation catches errors, explains them, and reduces their recurrence.

Weight the misses correctly

A one-unit drift in a slow-moving location does not belong in the same bucket as damaged inbound freight, a bundle assembly mistake, or an FBA compliance issue. If leadership sees one blended discrepancy number, they will miss the actual risk.

Split reporting into at least two groups:

  • High-impact checks: compliance issues, damage, mislabeling, shipment-blocking variances, bundle errors
  • Routine checks: stable SKU verification, bin audits, location count drift, housekeeping-related mismatches

That split improves client reporting too. Brands want to know whether you found a small count issue or prevented an outbound failure.

For teams building these reports inside a WMS, system structure matters. The platform has to support reason codes, exception workflows, and audit trails. If you are reviewing options, this guide to types of warehouse management systems is a practical starting point. For broader reporting and software stack context, the Supply Chain Management SCM Software guide is also useful.

KPI discipline for 3PL accountability

In a 3PL setting, each KPI needs an owner. Inventory accuracy may sit with warehouse operations, but time to resolution often depends on client approval rules, quarantine procedures, and WMS permissions. Root cause coding can also break down if the floor team logs every issue as “adjustment” instead of naming the process failure.

Set review rules in advance. Decide who can approve write-offs, who signs off on root cause, and how often repeat variances are reviewed with the client. That is how spot checks stop being a warehouse task and start working as a real control system for e-commerce inventory.

Integrating Spot Checks with Your 3PL and WMS

Spot checks fail when they live in a spreadsheet no one trusts. They work when the result moves directly into the system that runs receiving, putaway, fulfillment, and replenishment.

A person interacting with a futuristic digital holographic interface showing logistics data and inventory management systems.

For an in-house warehouse, that means your WMS should treat spot checks as operational events, not side notes. For a brand using a 3PL, it means the provider should show you how those events are triggered, documented, approved, and closed.

What the WMS should do after a spot check

A mature workflow connects the floor action to the system immediately.

At minimum, the WMS process should support:

  • Task creation: supervisors can assign checks by SKU, location, client, or exception type.
  • Real-time updates: approved variances don't sit in a queue waiting for manual cleanup.
  • Hold logic: damaged, mislabeled, or questionable inventory can be quarantined fast.
  • Audit trail: someone can review who counted, what changed, and why.
  • Trend reporting: repeated issues surface by product, zone, or workflow.

If you're evaluating platform fit, a broader Supply Chain Management SCM Software guide can help frame the difference between a system that merely stores inventory data and one that supports operational control across receiving, warehousing, and fulfillment.

What to demand from a 3PL

If your inventory sits with a fulfillment partner, ask direct questions. Don't settle for “we do cycle counts.”

Ask for specifics:

  • How are spot checks triggered? Randomly, by ABC priority, by event, or by client request?
  • What gets documented? Count only, or also condition, labeling, and packaging state?
  • Who can approve adjustments? Floor associate, lead, supervisor?
  • How are root causes categorized?
  • How do clients see the result? Portal note, exception report, ticket, or weekly ops review?

A strong partner should also show how spot checks tie into its warehouse management system capabilities, especially if your inventory needs channel-specific handling like Amazon FBA prep, DTC fulfillment, and marketplace routing from the same stock pool.

Why this matters for FBA and multichannel sellers

FBA prep is where weak controls become expensive. A unit can be physically present and still not be shipment-ready because the label is wrong, the bundle is incomplete, or the packaging doesn't match the inbound plan.

That's why spot check inventory can't stay limited to quantity verification. In a modern 3PL environment, the check has to include:

  • Label correctness
  • Prep state
  • Sellable condition
  • Location integrity
  • Readiness for the destination channel

The best spot check is the one that stops a non-compliant shipment before it leaves the building.

Brands should expect transparency here. If your 3PL can't explain its spot check SOP, can't show documented exceptions, or can't tie variances back to workflow owners, you're operating with blind spots.


If you need a fulfillment partner that treats inventory control as an operating discipline, not a once-in-a-while audit, Snappycrate is built for that standard. The team supports storage, order fulfillment, and Amazon FBA prep with the kind of hands-on warehouse process control that helps sellers catch issues early, stay compliant, and scale without losing visibility.

0 Continue Reading →

A Guide to Flawless Physical Inventory Counting for Ecommerce

Let's be real—the words "physical inventory count" don't exactly spark joy. For most e-commerce sellers, it sounds like a massive headache that brings business to a grinding halt. But what if you viewed it not as a chore, but as a crucial health check for your brand?

A physical inventory count is simply the process of manually counting every single item in your warehouse. It’s how you make sure the numbers in your software match what's actually sitting on your shelves. Get this right, and you prevent a world of operational pain.

Why Accurate Physical Inventory Counting Is Non-Negotiable

A man in a warehouse checks inventory on a tablet, surrounded by shelves of boxes.

We've seen it happen time and again. A fast-growing brand is prepping for a huge Black Friday sale. Their inventory system says they have 500 units of their top-seller, so they pour money into ads, expecting a windfall.

Then the orders start flooding in, and suddenly, everything stops. A frantic warehouse check reveals the gut-wrenching truth: there were only 50 units on the shelf, not 500. A tiny data entry mistake from a month ago just cost them their biggest sales day of the year.

This isn't just a scary story; it's what happens when the digital world and the physical world don't align.

The True Cost of Inaccurate Counts

Flying blind with bad inventory data creates a domino effect across your entire business. The consequences are more than just a little inconvenience.

Here's what you're up against:

  • Lost Sales from Stockouts: The most obvious one. Your system says you have stock, but the shelf is bare. You’ve just let a customer down and sent them straight to your competitor.
  • Wasted Capital on Overstock: The flip side is just as bad. Tying up cash in products you thought were selling means you can't reinvest in your actual winners. It's a silent profit killer.
  • Flawed Financial Reporting: Your inventory is one of the biggest assets on your balance sheet. If that number is wrong, your financials are a work of fiction, which can jeopardize everything from business loans to a potential sale of your company.

Since so many errors start with a simple typo during receiving or counting, looking into data entry automation solutions can be a game-changer for shoring up accuracy from the very start.

Finding the Right Counting Method

The good news is you don’t have to shut down your entire operation for a week to get an accurate count. You have options, and the right method depends on your business size, SKU count, and how much disruption you can handle.

Globally, there are over 71 million point-of-sale (POS) terminals helping businesses track what they sell, and transaction volumes have jumped by 12% annually for five years straight. This just goes to show how critical real-time, accurate data has become—and it all starts with a trustworthy physical count.

The core purpose of a physical count isn't just to find errors; it's to diagnose why they happened. It transforms a tedious task into a strategic health check for your entire operation.

To help you decide, here’s a quick breakdown of the common counting methods.

Inventory Counting Methods at a Glance

Method Frequency Best For Operational Disruption
Full Physical Count Annually or biannually Businesses needing a complete, single-point-in-time valuation for financial reporting. High. Often requires a complete operational shutdown for 1-3 days.
Cycle Counting Daily or weekly Businesses with many SKUs or those wanting continuous accuracy without shutting down. Low. Integrates into daily workflows, counting small sections at a time.
Spot Checking As needed Verifying specific SKUs that are high-value, fast-moving, or show frequent discrepancies. Very Low. Quick checks that take just a few minutes and don't halt operations.

Choosing the right approach—or even a hybrid model—is a foundational part of solid inventory management.

For a deeper dive into building a resilient inventory strategy, check out our complete guide on inventory management best practices.

Planning Your Count for Maximum Accuracy

Warehouse workers in safety vests conduct a physical inventory count, checking items on shelves and recording data.

Anyone who's run a warehouse knows the truth about physical counts: success or failure is decided long before a single item gets tallied. The real work happens in the planning phase. Good preparation is the line between a smooth, accurate audit and a chaotic weekend filled with errors and frustration.

Honestly, it’s about 90% prep and 10% actual counting.

First things first, you have to pick the right moment. Timing is everything, because a full physical count brings your entire operation to a dead stop. You want to schedule it for your absolute slowest period—think a quiet Tuesday morning, not the Friday afternoon rush before a big holiday sale.

This minimizes the inbound and outbound orders you have to freeze, which dramatically cuts down on the risk of items being missed or counted twice. For cycle counts, you have more flexibility. You can easily slot those in at the start or end of a shift, before the day's picking and packing madness begins.

Preparing the Physical Space

Once you’ve got the count on the calendar, it’s time to get the warehouse floor ready. A clean, organized space is a countable space. Start by getting everything off the floors, clearing the aisles, and making sure every single location is easy to get to.

This isn’t just about being tidy; it’s about eliminating the obstacles that create mistakes. A stray pallet blocking an aisle might cause a team to skip that section and forget to come back. A messy receiving dock could lead to new stock being counted before it’s even in the system, creating phantom inventory you’ll have to investigate later.

Your pre-count to-do list has to include these key tasks:

  • Establish a Cutoff: Announce a hard stop for all warehouse activity—receiving, picking, packing, and shipping. Every transaction before that cutoff time must be posted in your inventory management system. No exceptions.
  • Quarantine Problem Stock: Go find all your damaged, expired, or obsolete inventory and move it to a clearly marked quarantine zone. This stops unsellable products from accidentally getting mixed in with your good-to-go stock.
  • Pre-Label Everything: Make sure every bin, shelf, and pallet location has a clean, scannable label. If you’re breaking the warehouse into count zones, map them out and post diagrams so teams know their exact boundaries.

A critical—and often overlooked—step is to process all returns before the count begins. That pile of unprocessed RMAs in the corner is a classic source of discrepancies. The items are physically there, but they don't exist in your system's sellable stock levels yet.

Assembling and Training Your Count Team

Your people are hands-down the most important part of getting an accurate count. You can't just hand someone a clipboard and expect good data. You need to build a dedicated team and give them the right training and tools.

We've found the two-person team model is by far the most effective. It creates an instant check-and-balance system that catches errors on the spot.

  • The Counter: This person physically handles and counts the items. Their only job is to get the quantity right.
  • The Recorder/Verifier: This person stands back, confirms the counter's total, and enters it on a count sheet or into a scanner. That second pair of eyes is invaluable.

Before you turn your teams loose, hold a mandatory pre-count briefing. This is your chance to get everyone on the same page. Walk them through the count process, explain how to handle a product with a missing barcode, and review how to use the scanners or software.

Don't just talk about it—show them. Grab a product and physically demonstrate how to fill out a count tag or what to do if they find a discrepancy. This small investment in training pays for itself by preventing the same mistake from being repeated by every team across the entire warehouse.

Choosing Your Strategy: Full Count vs Cycle Counting

Picking the right inventory counting method isn't just a small operational detail—it's a massive strategic decision. Get it right, and your data is clean and your operations run smoothly. Get it wrong, and you’re bleeding cash from stockouts and overstocks.

The two main plays here are the old-school full physical count and the more modern cycle counting. Which one is best for your e-commerce brand comes down to your size, how many SKUs you juggle, and how much operational chaos you can handle.

The Full Count: The Annual Reset

A full physical count is exactly what it sounds like—an "all hands on deck," warehouse-wide mission to count every single item you own. It’s the brute-force approach, usually done once a year for the bean counters and the tax man.

The biggest problem? It’s a full-blown operational shutdown. You have to stop everything: no receiving, no picking, no shipping. For a busy e-commerce store, a 1-3 day shutdown is a disaster, leading to lost sales and a mountain of backorders to dig out from.

Think of it as hitting a giant reset button on your inventory data. It’s the only way to get a 100% complete snapshot of your stock levels, and it’s often a hard requirement for your end-of-year financials.

But that infrequency is also its fatal flaw. If you only count once a year, you could be running on bad data for 11 straight months. That means phantom stock, surprise stockouts, and wasted capital on slow-movers—problems you only uncover during the big annual audit. It tells you that you have a problem, but it doesn't help you find it fast.

A full physical count is perfect for telling your accountant what your inventory is worth. But for running your daily operations, it’s like checking your car’s oil just once a year—a whole lot can go wrong between those checkups.

Cycle Counting: The Continuous Approach

This is where cycle counting completely changes the game, especially for fast-moving e-commerce brands and 3PLs. Instead of one massive, disruptive event, cycle counting breaks the work down into a continuous, manageable process.

You count small, specific sections of your inventory on a rotating basis. Maybe you count one product family on Monday and a single aisle on Tuesday. The best part? You never have to shut down your entire operation.

This turns counting from a dreaded annual chore into just another routine task. By constantly checking and correcting small batches of inventory, you catch errors almost as soon as they happen. Your inventory accuracy stays incredibly high all year long, which is exactly what you need for lean, efficient fulfillment.

Plus, you can keep the orders flowing. When you cycle count, you just freeze inventory movements for the specific bins you’re actively counting, while the rest of the warehouse keeps humming along.

Implementing ABC Cycle Counting

The smartest way to do cycle counting is with an ABC analysis. This is just a simple way of applying the 80/20 rule (the Pareto Principle) to your inventory, making sure you focus your efforts where they matter most.

Here’s the breakdown:

  • A-Items: These are your superstars. They’re the top 20% of your products that drive 80% of your revenue. You need to count these high-value items all the time—think weekly or at least monthly.
  • B-Items: This is your middle class—products with decent sales volume and value. Checking these every quarter is usually a good cadence.
  • C-Items: These are your slow-movers. They make up the bulk of your SKU count but only a tiny fraction of your revenue. Counting them once or twice a year is more than enough.

For an online apparel brand, your best-selling black t-shirt is an A-Item that gets counted weekly. A seasonal scarf that sells well for a few months is a B-Item, counted quarterly. That niche phone case that sells a few units a year? That’s a C-Item you only need to verify annually. This approach keeps a tight leash on the products that actually make you money.

Executing the Count From Warehouse Floor to System Update

All that planning was just the warm-up. Now it's go-time on the warehouse floor. This is the part where you turn your prep work into accurate numbers, moving methodically from the shelf back to your inventory system.

The best way we've found to do this is with two-person teams. One person is the dedicated Counter, focused only on counting the items in a specific location. Their partner, the Recorder, stands back, visually confirms the number, and then records it. This simple, built-in check is your best defense against the small human errors that create big inventory headaches later.

As your teams work through their zones, you need a simple way to track what's been counted. The last thing you want is someone double-counting a section or, even worse, skipping one entirely. We swear by brightly colored painter's tape or removable stickers. Once a bin or pallet is counted and verified, slap a sticker on it. It’s a dead-simple visual cue for everyone to see what’s done and what’s left.

On-the-Floor Best Practices

To keep things running like a well-oiled machine, your teams need a clear workflow. It's the small habits on the floor that make the biggest difference in your final numbers.

Here are a few ground rules we give our count teams:

  • Use Count Tags: For every location, fill out a two-part count tag with a sequential number. One half stays on the product, the other gets turned in. This creates a physical paper trail that’s a lifesaver when you’re investigating a variance.
  • Do Spot Checks: Have a manager or supervisor swing by "completed" sections and do a few quick recounts. They can compare their numbers to what the team recorded. This keeps everyone on their toes and helps you catch any issues early on.
  • Handle "Found" Items Smartly: Your teams will absolutely find products in the wrong spot. The rule is simple: count it where you find it. Make a detailed note on the count sheet, but do not move the item mid-count. Moving inventory around during a count is a recipe for disaster.

Getting this right is crucial. Bad inventory data is a direct cause of stockouts and overstocking, which kills your order fulfillment rates. With the warehousing market projected to hit $869.32 billion by 2026, precision inside North America's 25,500 warehouses has never been more important.

From Physical Tally to System Update

Now for the most sensitive step: updating your inventory management system (IMS) or WMS. This is where one wrong click can erase all your hard work. You absolutely must have a clean data cutoff.

Before you update a single number, you have to "freeze" the inventory in your system. This means ensuring every pre-count transaction—all shipments, receipts, and adjustments—has been fully posted. The system's on-hand quantity must be locked at the exact moment your physical count started.

Once you’ve gathered all the count sheets or synced your scanners, you'll start comparing the physical counts to what your system thinks you have. You will find discrepancies. Don't panic; this is normal.

The key is to investigate any significant variances before you finalize the adjustment. If your system shows 100 units but your team counted only 90, don't just write off the 10 units. Send a supervisor to recount that specific SKU or location. More often than not, it’s a simple miscount, a case pack that was overlooked, or inventory that was found after the initial tally.

This infographic breaks down the two main strategies—full counts vs. cycle counting—that lead up to this execution phase.

Flowchart comparing full count and cycle counting inventory strategies, detailing steps, frequency, and accuracy.

As the chart shows, a full count is disruptive but comprehensive, while cycle counting is a continuous process. Whichever method you use, only make the final inventory adjustments after you've confirmed discrepancies with recounts. This ensures the data you commit to your system is as clean as possible. Managing this stage correctly is just as foundational as having a solid receiving and inspection process for new stock.

Alright, let's get down to what happens after the scanners are put away and the last SKU is counted. Thinking you're done? Not even close. The real work—and the real value—of a physical count starts right now. This is where you dig into your data, reconcile the differences, and turn mistakes into money-saving process improvements.

Don't just blindly update your system numbers to match what you counted on the floor. That’s a massive missed opportunity. Instead, think of yourself as an inventory detective. Every single discrepancy, or variance, is a clue that can lead you to a broken process that's quietly costing you money.

Comparing Your Count to Your System

First things first, you need a clean comparison. Pull an inventory report from your system for the exact moment you froze activity before the count. Now, line that up SKU-by-SKU against your new physical count numbers.

You’re going to find variances. It’s a guarantee. The key is not to panic, but to prioritize. We group them into three buckets to figure out where to focus our energy:

  • Minor Variances: You're off by one or two units on a low-cost item. It's not ideal, but for now, you'll likely just note it and adjust. Don't spend hours hunting for a missing $0.50 screw.
  • Significant Variances: This is where the alarm bells ring. Any big quantity difference, or any variance on a high-value "A-item," needs to be investigated immediately.
  • Zero Variances: The physical count perfectly matches the system. Take a moment to celebrate! This tells you exactly which parts of your receiving, picking, and shipping processes are running like a well-oiled machine.

A variance of five units on a $500 electronic device is a much bigger fire to put out than being off by 100 units on a cheap accessory. This triage step is critical.

A variance isn't just a number; it's a symptom. Simply adjusting the quantity without finding the root cause is like taking a painkiller for a broken arm—you’re ignoring the real problem, and it will happen again.

Playing Detective with a Problem SKU

Found a significant variance? Time to put on your detective hat. The only way to find the source of the problem is to retrace the SKU's entire journey through your warehouse since the last accurate count.

Let’s say your team counted 85 units of a popular gadget, but your inventory management system insists you have 100. Where did those 15 units go? It's time to pull the records and follow the trail.

Here’s where we always start looking:

  • Recent Purchase Orders: Was a recent delivery of 15 units received into the system but never actually put away? Or maybe it was short-shipped by the supplier, but your team entered the full PO quantity. Check the receiving docs against the packing slip.
  • Sales Orders: Did a picker grab the wrong item? It’s easy to imagine an order for five units being accidentally picked as a full case of 20, creating that 15-unit error.
  • Return Logs (RMAs): Maybe a customer returned those 15 units. They might be sitting on a returns shelf waiting to be processed but were never scanned back into sellable stock.
  • Transfer Slips: Was a pallet of this SKU moved to a different area—like a kitting station or a QC hold zone—without being properly transferred in the system?

By following this paper (or digital) trail, you can almost always pinpoint where things went wrong. It could be a simple receiving typo, a picker in a hurry, or a transfer that never got documented. This is how you uncover the root causes worth fixing.

The Financial Bottom Line

After you’ve investigated and recounted, you'll inevitably have some variances left over. These are the ones you can’t explain away with paperwork—they represent true shrinkage from loss, theft, or damage. Now, and only now, do you adjust them in your system.

This final adjustment hits your books directly. When you write off missing inventory, you’re removing an asset from your balance sheet. That loss flows straight to your income statement as an increase in your Cost of Goods Sold (COGS), which shrinks your gross profit.

For example, writing off 10 units of a product you paid $20 for means you have to record a $200 loss. This is precisely why a good physical count is so much more than just an operational task. It’s a crucial financial tool that protects your bottom line and gives you the data you need to build a smarter, more profitable warehouse.

Using Tech and Your 3PL for Smarter Counts

Let's be honest: counting inventory with a clipboard and a pen is a disaster waiting to happen. For a growing e-commerce brand, it’s not just slow—it’s a direct threat to your accuracy and your bottom line.

Modern tools and a solid fulfillment partner are your two best weapons in the fight for perfect inventory data.

The easiest upgrade you can make is to start using barcode scanners and mobile apps. Instead of scribbling down numbers, your team simply scans a location, scans the product, and punches the count into a handheld device.

This one change nearly eliminates manual data entry mistakes—the #1 cause of count variances—and syncs the numbers directly to your Warehouse Management System (WMS) in real-time.

Your WMS is Your Command Center

Think of a good WMS as the command center for your entire inventory count. It directs the process, collects the data, and flags problems as they happen. No more waiting until the end of the day to compare stacks of paper to system reports. A manager can see variances pop up on their dashboard instantly.

This means you can investigate right away. Say a team scans 50 units of a SKU, but the WMS expected 75. An alert can immediately send a supervisor to that location to double-check—not hours later when the trail has gone cold. This is how you shift from putting out fires to preventing them in the first place. You can learn more about this in our guide on automated inventory tracking.

Looking ahead, technology is taking an even bigger role. With the global computer vision market projected to hit $82.1 billion by 2032, tools like inventory-scanning drones are becoming a reality. Systems like Gather AI's promise to count 15x faster than human teams, and with warehouses expecting over 4.2 million commercial robots by 2026, automation is clearly the future of inventory accuracy.

Getting on the Same Page with Your 3PL Partner

For most e-commerce sellers, your warehouse isn’t down the hall—it’s miles away at your third-party logistics (3PL) provider. But that doesn't mean you give up control. It just means you manage the process through clear communication and firm expectations. A great 3PL is an extension of your own team.

Don't be afraid to dig into the details. The quality of their answers about their counting process will tell you everything you need to know about their commitment to accuracy.

Your 3PL partner holds one of your company's most valuable assets. Treating them like a black box is a recipe for disaster. Build a transparent partnership where you can trust their process and their data.

For e-commerce brands, it's also critical to have solid strategies for turning inventory data into actionable insights, which helps improve both count accuracy and overall stock management.

Critical Questions for Your 3PL

When you talk to your fulfillment partner about inventory counts, go in with a plan. You need to make sure their process is rock-solid, especially if you have complex inventory needs like kits, bundles, or FBA prep.

Here are the questions you absolutely must ask:

  • What's your counting methodology? Do you perform a full, wall-to-wall count once a year, or do you run a cycle counting program? If it's cycle counting, how often do you count high-value (A-level) items versus slower movers?
  • What technology do you use? Are your teams using modern barcode scanners and a WMS, or is this still a paper-and-pen operation?
  • How do you train your count teams? What's in place to ensure consistency? For example, do you use two-person teams where one person counts and the other verifies?
  • What does your variance investigation process look like? When a count is off, what specific steps do you take to find the root cause before just adjusting the number in the system?
  • What kind of reporting will I get? Ask for a sample report. It needs to clearly show the system quantity, the physical count, the variance, the final adjusted number, and any notes from the investigation.

Your Top Inventory Count Questions, Answered

When it comes to inventory counts, a few questions always pop up. We get it—it's a massive undertaking. Let's tackle the big ones we hear from e-commerce sellers all the time.

How Often Should We Be Counting Inventory?

This really comes down to your strategy and the value of your products.

Most brands do a full, wall-to-wall physical count once a year, mainly for financial reporting and tax season. But for keeping your operations sharp, cycle counting is the way to go.

Think about it this way: your high-value “A” items might need to be counted monthly or even weekly. On the other hand, your slow-moving “C” items can probably wait for a quarterly or annual check-in.

What Is an Acceptable Inventory Variance?

While nobody hits 100% accuracy forever, the industry benchmark for an acceptable inventory variance is around 1-2%.

But let's be real—your tolerance for high-value products should be much, much lower. Ideally, zero.

The goal isn't just to hit an "acceptable" number. The real win is investigating why those discrepancies happened in the first place. That variance number tells you there’s a problem; your investigation will tell you how to fix your process so it doesn't happen again.

Can We Keep Selling During a Physical Count?

During a full physical count, absolutely not. It's a bad idea.

Every new sale skews your numbers and makes the data you're collecting worthless. This is exactly why freezing all warehouse operations—receiving and shipping—is so critical for an accurate wall-to-wall count.

With cycle counting, though, you get more flexibility. You only need to freeze movements for the specific SKUs or locations being counted, which means the rest of your fulfillment operations can keep running without a hitch.


Ready to stop worrying about inventory accuracy? Let the experts at Snappycrate handle your storage, inventory management, and fulfillment so you can focus on growing your business. Learn more about our 3PL services.

0 Continue Reading →